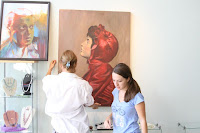
Or, I should say: meet a guy who looks like my grandpa but is not quite my grandpa because the proportions are way off.
This unfinished portrait is based on a photo of him from 1950, when he served with the Marine Corps in Korea. I'm going to use this to discuss proportions and how to fix them.
Sometimes you just can't pinpoint exactly what is off, or what needs fixing. It's a collection of little missteps that just make it not quite right. So naturally, you abandon the painting for seven years and hope that a fire or flood will whisk it away so you don't have to fix it.
Anyway. Here's a little trick to help remedy a proportion dilemma.
It's also a great way to fact-check your drawing accuracy. You can do this for bodies, cars, anything.
1) Cut a piece of tracing paper and tape it to the in-progress painting.
3) Now, pull up the reference photo and hold up the tracing paper. Try to enlarge the image to match the tracing paper lines. (If it's very off, just try to match up the eyes.)
4) Using a red colored pencil, trace some of the actual image onto the tracing paper. Again, just the boundary lines. Sketch lightly so you don't damage your screen.
5) Pull the tracing paper away and now you have a cheat sheet. All of the differences are mapped out and now you know what needs to be fixed.
Blue lines = Your painting
Red lines = The actual image
The areas with the biggest gap between the two colors are the most drastic errors.
(If the two lines mix and you have purple, you are perfect. Close this window and never return to this blog.)
For example, there are a few areas on gramps that are way off:


• Ear is too small
• Shoulder is too high
• Hat needs to be bigger
• Mouth is off
Sometimes you just can't pinpoint exactly what is off, or what needs fixing. It's a collection of little missteps that just make it not quite right. So naturally, you abandon the painting for seven years and hope that a fire or flood will whisk it away so you don't have to fix it.
Anyway. Here's a little trick to help remedy a proportion dilemma.
It's also a great way to fact-check your drawing accuracy. You can do this for bodies, cars, anything.
1) Cut a piece of tracing paper and tape it to the in-progress painting.
2) With a blue colored pencil, lightly sketch some of the boundary lines. I like to do the overall face shape, the eye lid, iris, just below the tip of the nose, a few lip lines, etc. Don't get too detailed. It shouldn't take more than a minute.
3) Now, pull up the reference photo and hold up the tracing paper. Try to enlarge the image to match the tracing paper lines. (If it's very off, just try to match up the eyes.)
Lightly tape the tracing paper to the screen.
The lobe isn't long enough (and you know those grandpa ear lobes) and the upper part is too small.
4) Using a red colored pencil, trace some of the actual image onto the tracing paper. Again, just the boundary lines. Sketch lightly so you don't damage your screen.
5) Pull the tracing paper away and now you have a cheat sheet. All of the differences are mapped out and now you know what needs to be fixed.
Blue lines = Your painting
Red lines = The actual image
The areas with the biggest gap between the two colors are the most drastic errors.
For example, there are a few areas on gramps that are way off:


• Shoulder is too high
• Hat needs to be bigger
• Mouth is off
At least I know exactly what needs to be done to remedy the proportions.
If there are a lot of discrepancies, don't throw your painting in the garbage* (*unless it's really bad, then throw it in the garbage) but do a light wash of watered-down acrylic (like a light grey) over the whole thing and now you have an excellent rough draft that you can start to refine.
If there are a lot of discrepancies, don't throw your painting in the garbage* (*unless it's really bad, then throw it in the garbage) but do a light wash of watered-down acrylic (like a light grey) over the whole thing and now you have an excellent rough draft that you can start to refine.


